Ensuring that your WordPress sites are regularly updated is crucial, but sometimes these updates can lead to issues. It’s important to promptly address any problems that arise during the updating process. In this tutorial, we will guide you through resolving the common error messages of WordPress publishing failed and updating failed. We’ll begin with simple solutions that you can try right away. If the initial solution doesn’t resolve the issue, don’t worry. We will provide additional troubleshooting steps to help you fix the WordPress Updating Failed error by the end of this tutorial.
Disabling Gutenberg editor and installing the classic editor plugin
If you recently updated your WordPress installation to version 5 or above, you might have encountered some issues with the new Gutenberg block editor. The Gutenberg editor is a drag-and-drop block editor that replaced the previous classic editor. If you’re experiencing difficulties with the Gutenberg editor, we have a simple solution for you. To fix the problem, you can disable the Gutenberg editor and revert back to the old classic editor plugin. Follow these steps to make the switch:
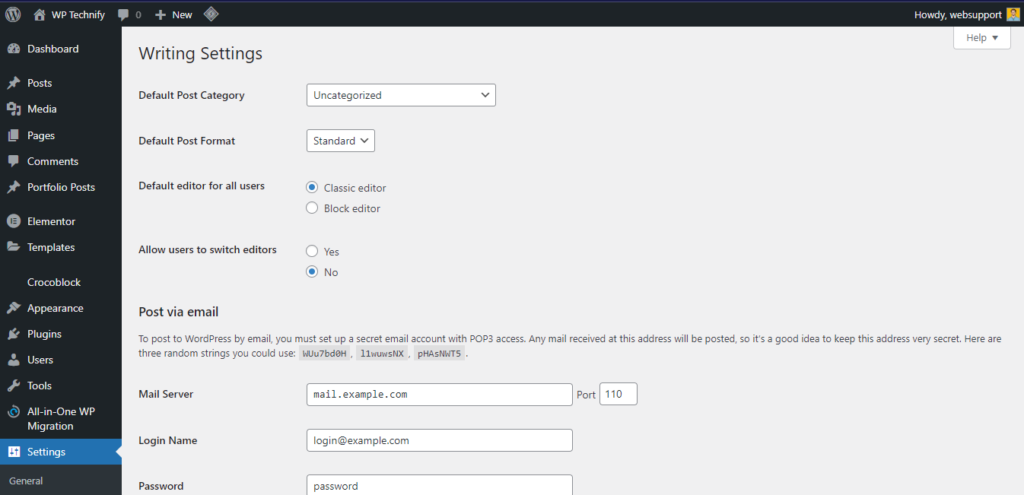
- Access the WordPress admin console and navigate to the “Settings” section.
- Click on the “Writing” sub-menu.
- Look for the option titled “Default editor for all users” and choose the “Classic Editor” plugin from the dropdown menu.
By following these steps, you can disable the Gutenberg editor and switch back to the familiar classic editor, which should help resolve any issues you were facing.
Installing classic editor – WordPress Updating Failed and Publishing Failed Errors
If you don’t have the classic WordPress editor available as an option, you will need to install it before proceeding. Here’s how you can do it:
- Access the Plugins menu in your WordPress admin console.
- Click on the “Add New” sub-menu.
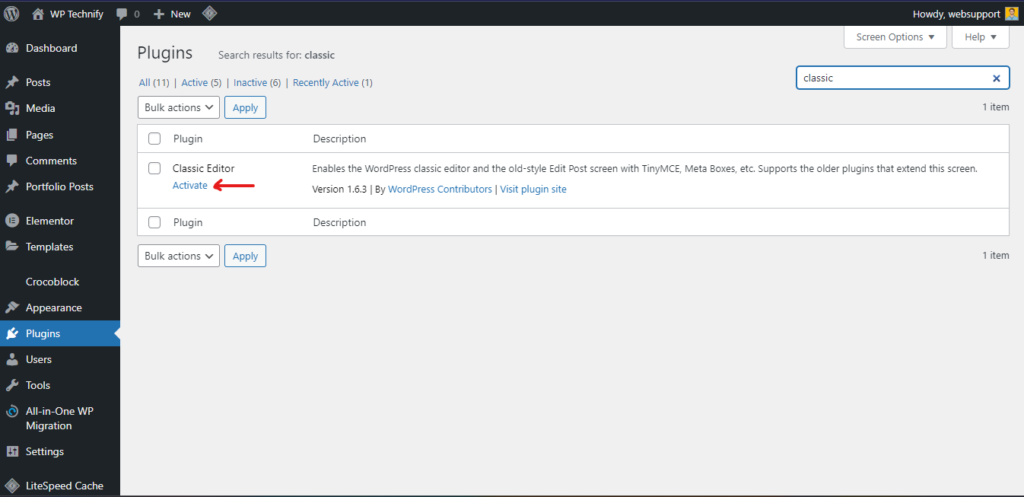
- On the right side of the page, you will find a search box. Type “Classic Editor” into the search box.
- Look for the Classic WordPress Editor plugin in the search results and click on the “Install Now” button next to it. Once the installation is complete, click on the “Activate” button to activate the plugin. You should see the button grayed out and a message indicating that the plugin is active.
- To double-check if you are using the classic editor plugin, go to the “Settings” section in your WordPress admin console.
- Click on the “Writing” sub-menu.
- Under the “Default editor for all users” option, ensure that the Classic Editor plugin is active.
By following these steps, you will be able to install and activate the Classic WordPress Editor plugin, and verify that it is active in the settings. This will allow you to use the classic editor for your WordPress pages and posts.
By installing the classic post editor, you can resolve the error messages encountered in WordPress. If the issue persists even after installing the classic editor, it is likely due to a conflict with a page builder plugin that is incompatible with the Gutenberg editor. If you prefer using the Gutenberg editor, you can consider enabling it again after the next plugin update, as it may resolve the conflict.
If the initial solution did not fix the problem for you, there are additional solutions available that you can try out. These alternative solutions aim to address the WordPress error messages and provide a resolution for your issue.
Activating debug mode
If you want to get more information about why your WordPress updating failed, you can try activating the debug mode. However, please note that this method requires FTP access to your host server. Through FTP, you can access all the files on your host server, granting you the ability to make changes. It’s important to exercise caution and ensure that you don’t accidentally delete or modify any critical files. To activate debug mode, follow these steps:
- Access your host server using an FTP client.
- Locate the wp-config.php file within your WordPress folder.
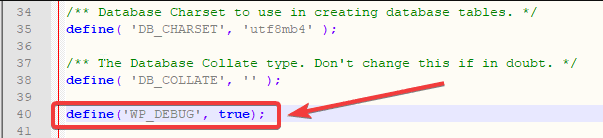
- Open the wp-config.php file using a text editor of your choice.
- Add the following line of code to the wp-config.php file: define(‘WP_DEBUG’, true);
- Save the wp-config.php file to apply the changes.
Remember to save the wp-config.php file after making the modification, otherwise, the debug mode won’t be activated.
If you no longer require the debug mode to be active in your WordPress site, you can easily deactivate it by removing or modifying the corresponding code. Here are two options to achieve this:
- Remove the code: If you want to completely remove the debug mode code, locate the wp-config.php file in your WordPress folder. Open the file using a text editor and find the line define(‘WP_DEBUG’, true);. Simply delete this line from the file and save the changes. This will disable the debug mode.
- Modify the code: Another option is to modify the code to change the debug mode setting. In the wp-config.php file, find the line define(‘WP_DEBUG’, true);. Instead of removing the line, you can change true to false, like this: define(‘WP_DEBUG’, false);. Save the file after making this change to disable the debug mode.
Choose the option that suits your needs and make sure to save the wp-config.php file after removing or modifying the code. This will disable the debug mode in WordPress.
WordPress Updating Failed – Deleting .maintenance file
To delete the .maintenance file from your WordPress site, you will need FTP access to your host server. Follow these steps:
- Access your host server using an FTP program.
- Navigate to the WordPress folder on your server.
- Locate the .maintenance file. Note that some FTP programs may not display files starting with a dot (.) by default, as they are considered hidden files. If you can’t see the .maintenance file, refer to the manual of your FTP program to enable the display of hidden files or files starting with a dot. Alternatively, you can log in to your server’s control panel and use the file manager to locate the file.
- Once you have found the .maintenance file, simply delete it from the server. You can usually right-click on the file and choose the “Delete” or “Remove” option.
By deleting the .maintenance file, you are removing the maintenance mode flag, which may be causing issues with updating or publishing your WordPress site.
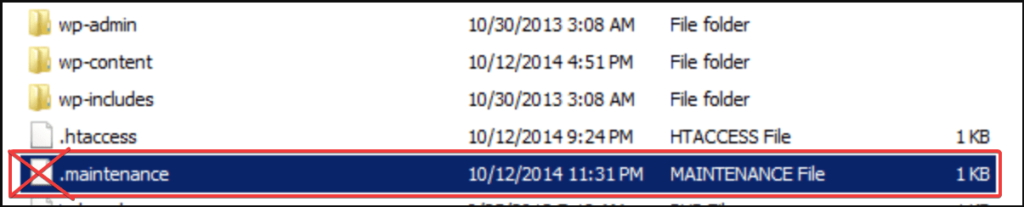
.maintenance file should usually expire after 10 minutes. That been said in some cases it does not. So manual deleting this file might fix the issue.
WordPress Updating Failed – Troubleshooting WordPress plugins
If you’re still experiencing error messages in WordPress despite trying the previous solutions, you can attempt to troubleshoot the issue by deactivating all of your plugins. Follow these steps:
- Go to the “Plugins” menu in your WordPress admin console.
- Click on “Installed Plugins.”
- Select all of the plugins listed.
- Click on the “Bulk Actions” dropdown menu.
- Choose “Deactivate” from the options.
- Finally, click the “Apply” button.
By deactivating all of your plugins, you can determine if any of them are causing the issue. After deactivation, gradually reactivate each plugin one by one and check if the error message reoccurs. This process will help you identify the specific plugin that may be conflicting with WordPress. Once you have identified the problematic plugin, conduct research on how to resolve the issue associated with that particular plugin.
If you’re facing issues with WordPress Updating Failed and Publishing Failed errors and need assistance, you can reach out to WP Technify for expert support. They specialize in resolving WordPress-related problems and can provide the necessary guidance and solutions to fix these errors. You can contact WP Technify through their website. Their dedicated team is ready to help you overcome these errors and ensure your WordPress site is running smoothly.