WordPress websites have become a frequent target of DDoS attacks, resulting in substantial financial losses for numerous small businesses that heavily rely on online traffic for their revenue streams.
DDoS attacks pose a grave danger to websites, irrespective of their scale and scope. Hence, it is crucial to adopt comprehensive security measures to safeguard your website from potential threats.
In this article, we will delve into the detrimental effects of WordPress DDoS attacks on your site. Additionally, we will offer practical advice and strategies to proactively prevent such attacks from occurring in the first place.
What Is a DDoS Attack?
A Distributed Denial of Service (DDoS) attack is a malicious cyberattack that aims to incapacitate a website or server by inundating it with an overwhelming amount of traffic. The goal of such attacks is to disrupt the normal functioning of the targeted website or server. WordPress-powered sites are not immune to these types of attacks and can also be targeted by DDoS attacks.
How DDoS Attacks Can Affect WordPress Websites
The impact of DDoS attacks on WordPress websites, particularly for small businesses, can be significant due to their limited resources to combat such attacks. When a DDoS attack successfully targets a website, it can result in website downtime, rendering it inaccessible to users.
A notable example of the consequences of DDoS attacks occurred in 2016 when DYN, a DNS service provider, was targeted. This attack affected numerous popular sites, including Netflix, Reddit, PayPal, and Visa, causing disruption for internet users in Europe and North America.
DDoS attacks have various negative effects on website owners and users alike. Some of the damages caused by these attacks include:
- Website Downtime: The targeted website becomes unavailable, causing inconvenience for users and hindering their ability to access services.
- Lost Traffic and Revenue: DDoS attacks can lead to a significant loss of traffic and revenue. For instance, during the DYN attack, Sony reported a staggering loss of $2.7 million in just two hours.
- Reputation Damage: Falling victim to a DDoS attack can erode users’ trust in your brand and lead to a negative impact on your website’s reputation. Search engines may also blacklist the website as a result.
- Cost of Mitigation: Defending against DDoS attacks requires specialized resources and technical expertise, which can result in substantial costs for mitigation measures.
- Data Loss: DDoS attacks often serve as a smokescreen for other cyber attacks, such as brute force attacks, which can result in data loss. A study by Kaspersky in 2015 found that 26% of websites targeted by DDoS attacks experienced data loss.
Given these potential consequences, it is crucial for website owners to take proactive steps to protect their WordPress websites from DDoS attacks and mitigate their impact.
Tips for Protecting Your WordPress Website From DDoS Attacks
Protecting your website from DDoS attacks is crucial, as these malicious attacks pose a serious threat to website owners regardless of their size or resources. While no website is entirely immune to DDoS attacks, there are steps you can take to enhance your WordPress website’s DDoS protection and minimize the impact of such attacks.
In this article, we will provide you with valuable tips and strategies to strengthen your WordPress DDoS protection. By implementing these measures, you can significantly reduce the risk of falling victim to a DDoS attack and ensure the uninterrupted availability and performance of your website.
1. Enable Two-Factor Authentication (2FA)
Two-factor authentication (2FA) is an essential security measure that adds an extra layer of protection to your WordPress website. By requiring users to provide a second form of authentication, such as a one-time code sent to their phone or email, before accessing sensitive pages like the WP admin page, you can significantly enhance the security of your website.
Implementing two-factor authentication helps safeguard against unauthorized access, brute force attacks, and DDoS attacks, providing an additional level of defense for your website’s sensitive information.
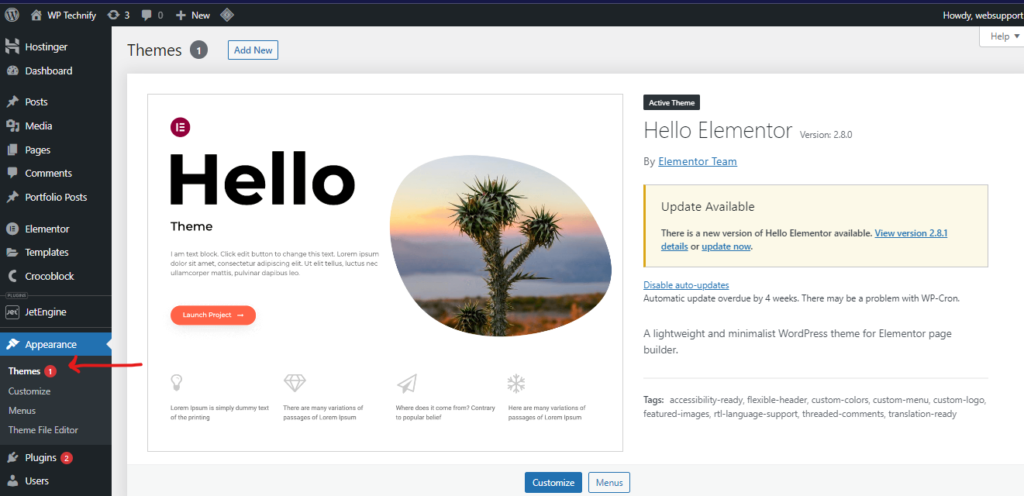
To set up two-factor authentication (2FA) on your WordPress website, you can use the MiniOrange Google Authenticator plugin. Installing this plugin is simple. Just log in to your WordPress dashboard, navigate to the Plugins section, click on “Add New,” and search for “MiniOrange Google Authenticator.” Once you find the plugin, you can install and activate it to begin setting up two-factor authentication for your WordPress site.
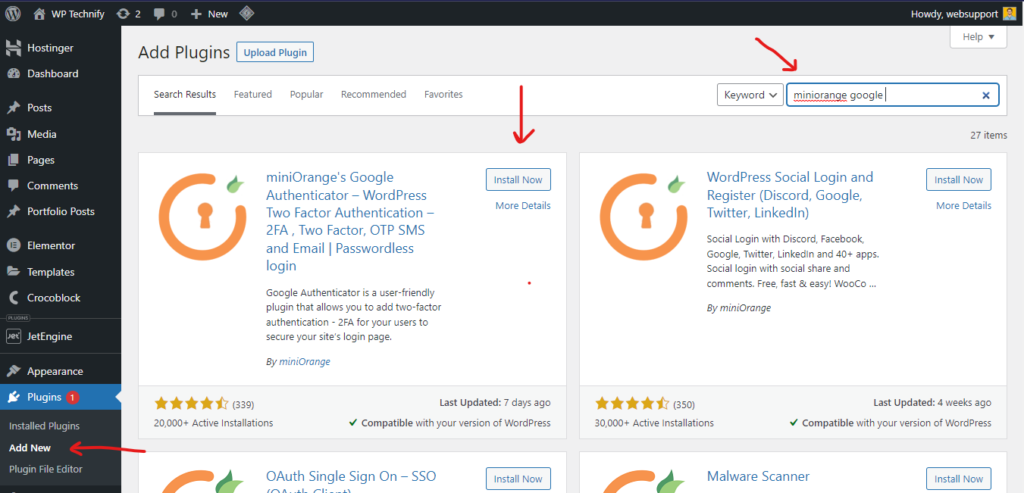
Next, click the Install Now button next to the plugin name to install the plugin on your website. Once you install the plugin, the button will change to ‘Activate’. Click on it to activate the plugin.
Configuring the MiniOrange Google Authenticator
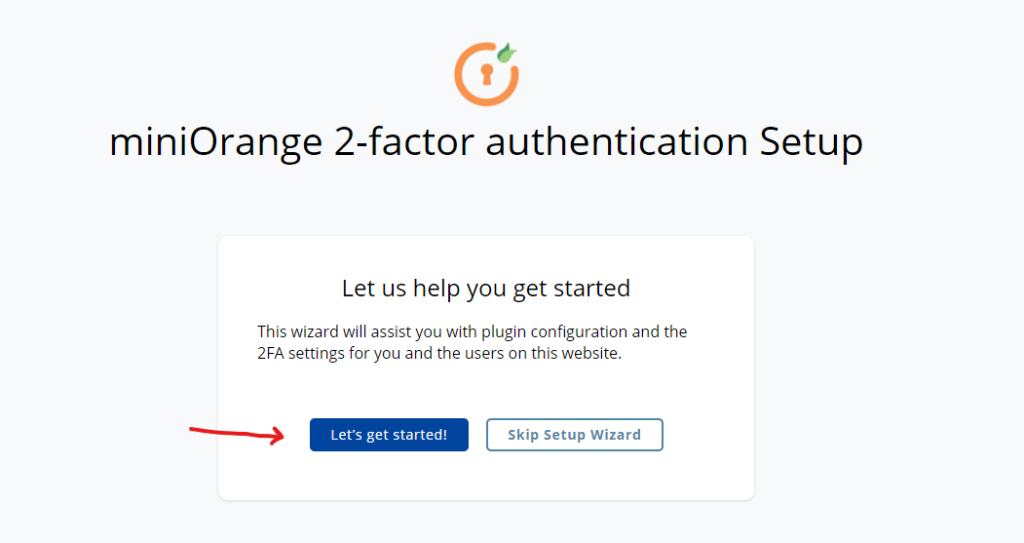
Once you have successfully activated the MiniOrange Google Authenticator plugin, the next step is to connect it to the Google Authenticator app on your mobile device. This process is necessary to fully activate two-factor authentication (2FA) on your WordPress site.
To begin, locate and click on the “Let’s get started” button in the plugin settings.
After installing and activating the MiniOrange Google Authenticator plugin, you can further configure the two-factor authentication (2FA) settings for your WordPress website.
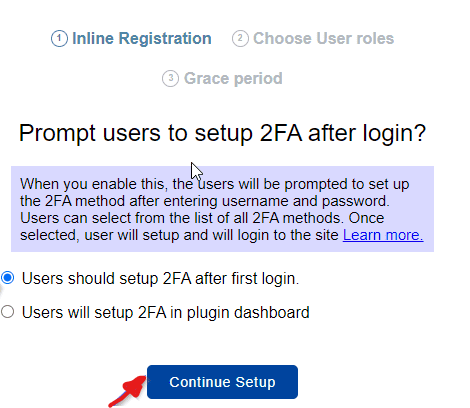
One important setting is the “Users who should set up 2FA first after login” option. By selecting this option, you can enforce the requirement for all users to set up 2FA before they can log in to your website. This ensures that every user goes through the process of enabling two-factor authentication for enhanced security.
To make this selection, go to the plugin settings page and locate the “Users who should set up 2FA first after login” option. Once you have chosen this setting, click on “Continue Setup” to proceed with the configuration process.
To configure two-factor authentication (2FA) specifically for certain user roles, such as administrators, you can follow these steps:
- In the 2FA settings of the MiniOrange Google Authenticator plugin, locate the “Activate 2FA” section.
- Choose the “Only for specific roles” option to enable 2FA only for selected user roles.
- From the available user roles listed, check the box next to “Administrator” to activate 2FA for administrators.
- Once you have selected the desired roles, click on “Continue Setup” to proceed with the configuration process.
By selecting the “Only for specific roles” option and choosing the “Administrator” role, you ensure that 2FA will be activated only for users with administrative privileges. Other user roles, such as authors, will not be required to set up 2FA.
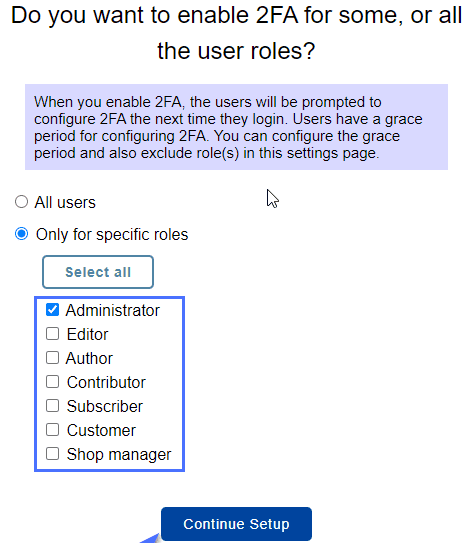
Next, choose whether to implement 2FA immediately or give users a grace period. Click All done to continue.
To set up the authentication method for two-factor authentication (2FA), you can follow these steps:
- In the MiniOrange Google Authenticator plugin settings, locate the “Authentication Method” section.
- From the available options, select the “Google / Microsoft / Authy Authenticator” option.
- After choosing the desired authentication method, click on the “Save and Continue” button to proceed.
By selecting the “Google / Microsoft / Authy Authenticator” option, you can configure the plugin to use either Google Authenticator, Microsoft Authenticator, or Authy as the chosen authentication method for 2FA. Clicking on “Save and Continue” will save your selection and allow you to proceed with the next steps of the setup process.
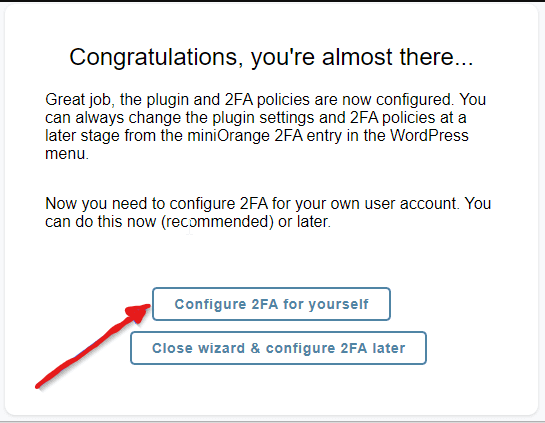
Next, select Configure 2FA for yourself to proceed to the next step of the configuration process.
Connecting MiniOrnage with Google Mobile Authenticator
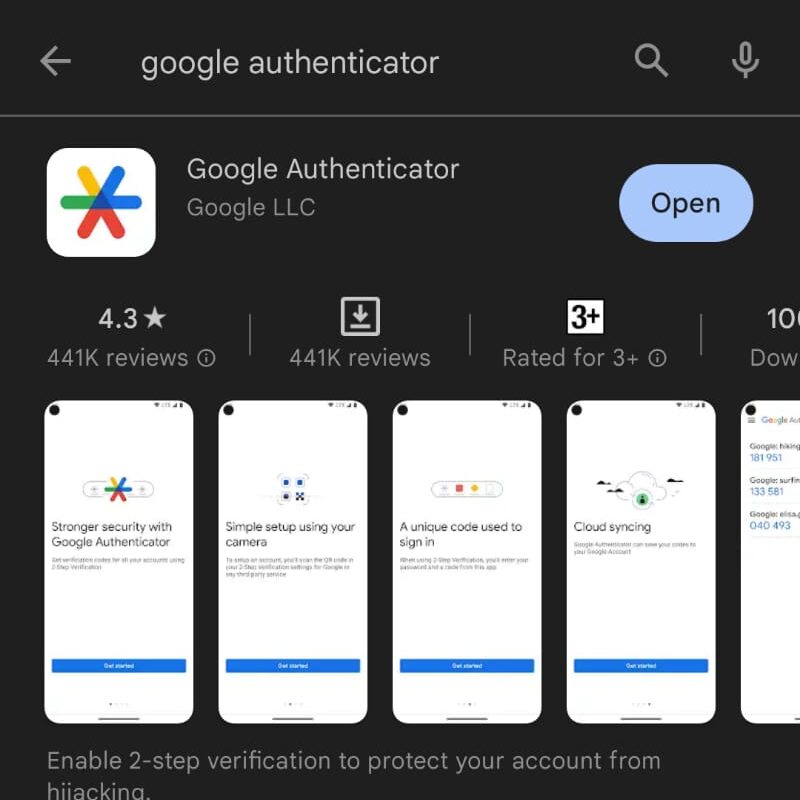
To get started with the two-factor authentication (2FA) setup using Google Authenticator, you’ll need to download the app on your Android or iOS device. Follow these steps:
- Open the Play Store (for Android) or App Store (for iOS) on your mobile device.
- In the search bar, type “Google Authenticator” and search for the app.
- Locate the official Google Authenticator app from Google LLC and click on it.
- Tap the “Install” or “Get” button to download and install the app on your device.
- Once the installation is complete, open the Google Authenticator app.
Downloading and installing the Google Authenticator app will provide you with the necessary tool to generate time-based one-time passwords (TOTP) for the 2FA authentication process.
After installing the app, you should see a menu page with two options: Scan a QR code and Enter a setup key.
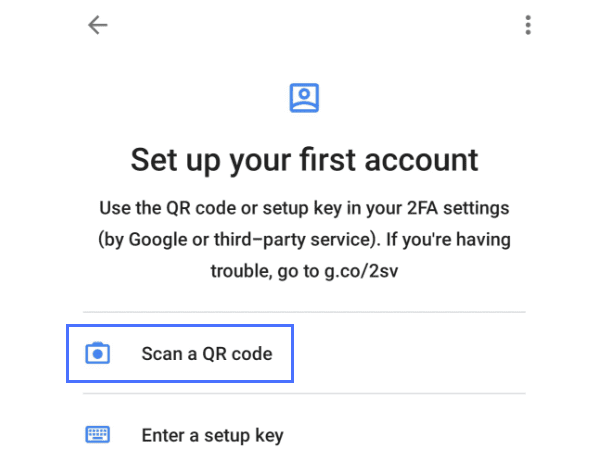
To proceed with the two-factor authentication setup, select the option to scan the QR code using the Google Authenticator app. Follow these steps:
- Open the Google Authenticator app on your mobile device.
- Tap the “+” or “Add” button to add a new account.
- Select the option to scan a QR code.
- Point your device’s camera toward the QR code displayed on your website.
- The app will automatically detect and scan the QR code.
- Once the QR code is scanned successfully, a six-digit code will be generated by the Google Authenticator app.
- Enter the six-digit code into the designated field on your website.
Scanning the QR code and entering the generated code ensures that the Google Authenticator app is linked to your website for secure authentication.
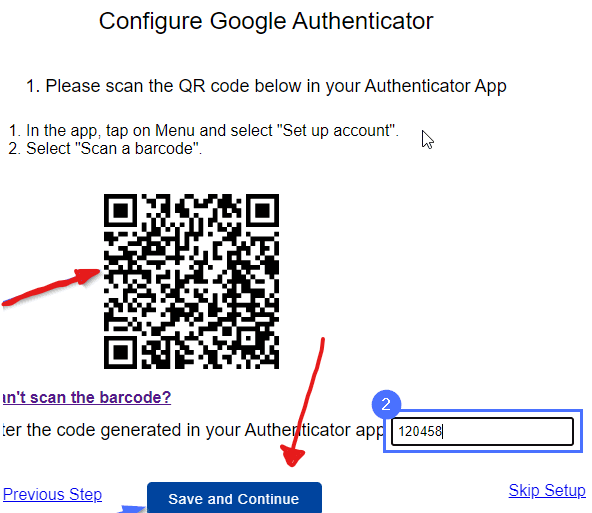
Confirm the input by selecting the Save and Continue option.
That’s it! You’ve successfully enabled 2FA on your website with MiniOrange Google 2FA.

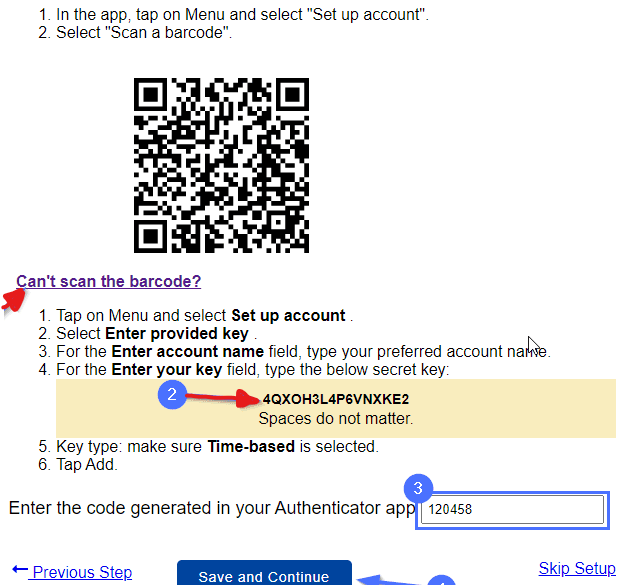
Can’t Scan the QR code in MiniOrange?
If you encounter difficulties scanning the QR code, you can manually set up the two-factor authentication (2FA) by following these steps:
- Click on the “Can’t scan the barcode?” option on the setup page. This will generate a unique key for setting up 2FA.
- Open the Google Authenticator app on your mobile device.
- Select the “Enter a setup key” or a similar option in the app.
- Copy the 16-character key provided by the MiniOrange 2FA plugin.
- Paste the key into the designated field in the Google Authenticator app.
By manually entering the setup key, you can still link the Google Authenticator app to your website for secure authentication, even without scanning the QR code.
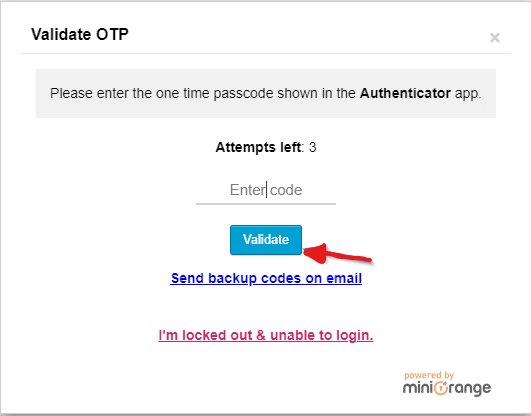
To verify the setup of two-factor authentication, you can log out of your WordPress site and try logging back in. Follow these steps:
- Visit the login page of your WordPress site.
- Enter your username and password as usual.
- On the login page, you will now see an additional field for the one-time password.
- Open the authentication app on your mobile device.
- Retrieve the six-digit one-time password generated by the app.
- Enter the one-time password into the designated field on the login page.
- Click the “Log In” button to proceed with the login attempt.
By requiring the one-time password generated from the authentication app, you add an extra layer of security to your WordPress login process. This helps protect your site from unauthorized access and potential DDoS attacks.
2. Use a Web Application Firewall (WAF)
To enhance the security of your WordPress website and protect it from DDoS attacks, you can utilize a Web Application Firewall (WAF). A WAF acts as a barrier between your website and malicious traffic, analyzing incoming requests and blocking any suspicious or harmful activity before it reaches your website’s servers.
Implementing a WAF on your WordPress site is made simple with the use of firewall plugins. One such plugin is Wordfence Security, which not only provides comprehensive security features but also includes a built-in firewall for DDoS protection.
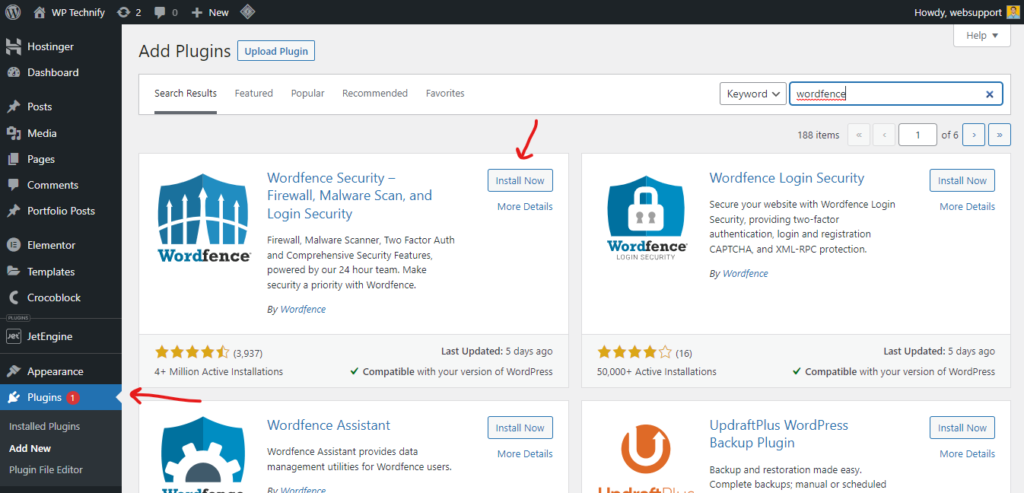
To install and activate Wordfence on your WordPress site, follow these steps:
- Log in to your WordPress admin dashboard.
- Navigate to the “Plugins” section and click on “Add New”.
- In the search bar located at the top right corner, type in “Wordfence” to search for the plugin.
- Locate the Wordfence Security plugin in the search results and click on the “Install Now” button next to it.
- Wait for the installation to complete, and then click on the “Activate” button to activate the plugin.
Once Wordfence is activated, it will start providing additional security measures, including the firewall, to protect your website from DDoS attacks and other threats. Regularly updating and configuring Wordfence settings will ensure that your website remains secure and safeguarded against potential vulnerabilities.
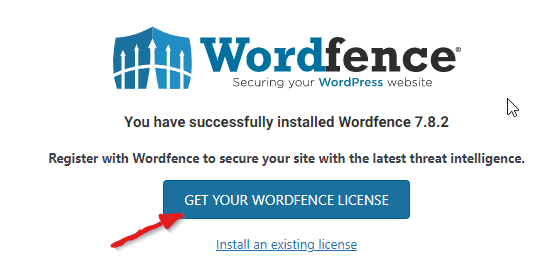
Once you have successfully activated the WordFence plugin, the next step is to obtain a license key. To do this, follow these instructions:
- On the next page after activating WordFence, you will see a button labeled “Get Your WordFence License.” Click on this button to proceed.
- This will redirect you to the WordFence website, where you can obtain your license key.
- Fill out the necessary information, such as your email address and website URL, to generate your license key.
- Once you have received your license key, go back to your WordPress admin dashboard and navigate to the WordFence settings.
- In the WordFence settings, you will find an option to enter your license key. Paste the key into the designated field and save your settings.
- Your WordFence plugin is now licensed and ready to provide enhanced security features for your WordPress site.
By obtaining a license key for WordFence, you ensure that you have access to the full range of features and updates that help protect your website from security threats and DDoS attacks.
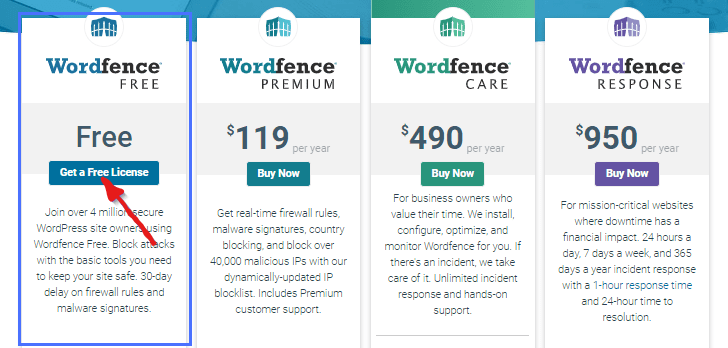
After installing the WordFence plugin, the next step is to select a plan that suits your needs. In this case, we recommend starting with the free plan, which offers a wide range of essential features for website protection.
To select the free plan, follow these steps:
- In the WordFence settings, look for the option to choose a plan or upgrade.
- Click on the “Select Free Plan” or similar button to proceed.
- A prompt may appear asking if you are willing to wait for 30 days to access the premium features. This is to give you a trial period to test out the plugin.
- Click on the option that says “I am okay waiting for 30 days” or something similar to continue with the free plan.
By choosing the free plan, you can explore and utilize the core features of WordFence without any cost. It provides essential security measures to safeguard your website from various threats, including DDoS attacks. If you find that you require additional features or advanced protection in the future, you have the option to upgrade to a paid plan.
Next, enter your email address, accept the terms and conditions, and click Register.
You should receive an activation email from Wordfence. Open your email and click on the Activation link.
Once you have completed the installation of the Wordfence plugin, you will be redirected to your WordPress dashboard. From there, you need to click on the “Install License” button to activate the plugin on your site. This step is crucial to ensure that Wordfence is actively working to protect your website.
To confirm if the Web Application Firewall (WAF) is enabled and functioning properly, navigate to the Wordfence section in your WordPress dashboard and click on the “Manage Firewall” link.
On the next screen, you will find a section that displays the status of the WAF. If the WAF status is active and the percentage figures are visible, it indicates that the WAF is enabled and operational.
By installing the Wordfence plugin on your website, you can enjoy several benefits, including protection against SQL injection attacks, limiting brute force attacks, and safeguarding against cross-site scripting vulnerabilities. These security measures enhance the overall security and resilience of your WordPress site.
3. Use Cloudflare’s CDN
Cloudflare is a widely used Content Delivery Network (CDN) provider that enhances website performance and offers protection against various cyber-attacks, including DDoS attacks.
One of Cloudflare’s key features is its ability to mitigate large-scale DDoS attacks and analyze traffic sources to identify potential threats from attackers.
Now, let’s guide you through the process of activating Cloudflare’s services for your website.
To get started, make sure you have access to your domain registrar’s admin dashboard. This access is necessary to allow Cloudflare to access your DNS settings.
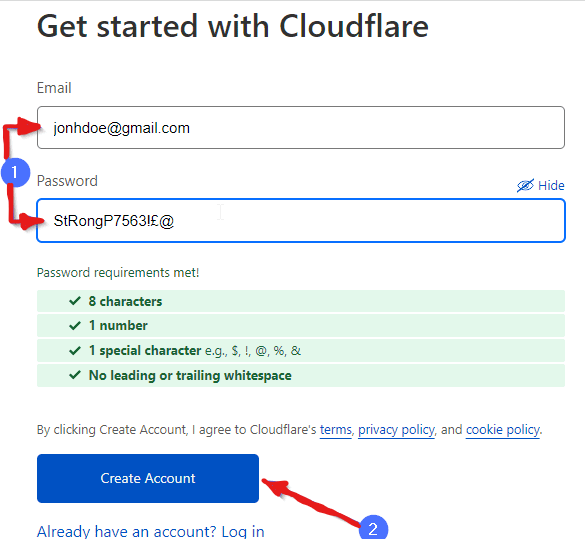
The first step is to create a Cloudflare account. Simply visit the Cloudflare signup page and provide your email address, choose a password, and click on “Create Account.”
Now that your Cloudflare account is set up, it’s time to add your website to the platform. After logging in to your account, click on the “Add Site” button to begin the process.
Enter your domain name (e.g., example.com) and click “Add site” to proceed.
Next, you’ll be prompted to choose a suitable Cloudflare plan based on the features you desire. The free plan offers basic protection, which should be sufficient for most websites. Select the free plan and click “Continue” to move forward.
On the next page, you’ll see a list of existing DNS records. It’s essential to review them carefully to ensure they are correct. Please refrain from making changes to your DNS records at this stage.
If you have reviewed the records and are satisfied with them, click “Continue” to proceed.
Now, you need to point your domain’s nameservers to Cloudflare. This is a crucial step to activate Cloudflare’s protection for your site.
You’ll need to replace your current nameservers with the new ones provided by Cloudflare on your domain registrar’s website.
Please note that the process of changing nameservers may vary depending on your hosting company. If you are uncertain about how to locate the nameserver settings, don’t hesitate to reach out to your web hosting provider. However, we’ll demonstrate how to do this with Namecheap.
Updating Namecheap Nameservers
To change the nameservers for your domain, follow these steps:
- Log in to your account and navigate to the Domain List section.
- Find the domain you wish to edit and click on “Manage.”
- Look for the “Nameservers” dropdown menu and choose “Custom DNS.”
- Enter the two nameservers provided by Cloudflare into the input boxes and click the check mark icon to save your changes.
- After making the changes, you can return to Cloudflare and verify the nameserver modifications by clicking “Done, check nameservers.”
Note: Keep in mind that the process of changing nameservers may take up to 48 hours to propagate fully across the internet.
4. Disable REST API in WordPress
WordPress REST API is a powerful tool that enables developers to interact with and manage WordPress data through HTTP requests. However, this API can also be exploited as a potential entry point for DDoS attacks.
To mitigate this risk, you can disable the WP REST API using various methods in WordPress. One of the easiest ways to do this is by using code snippets from the WPCode plugin.
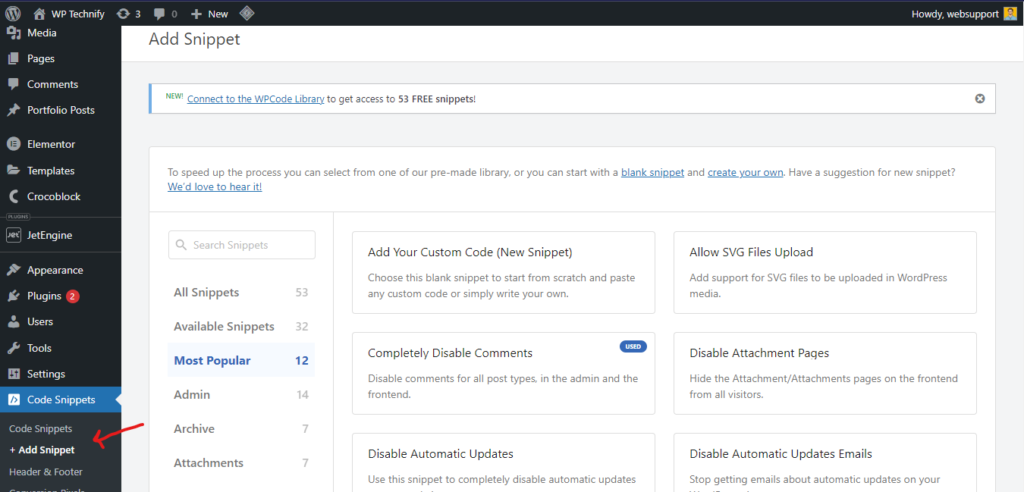
To get started, install and activate the WPCode plugin on your WordPress website.
Once the plugin is active, navigate to “Code Snippets” and click on “+ Add Snippet.” This will allow you to add the necessary code to disable the REST API and enhance your website’s security against potential DDoS threats.
To disable the REST API on your WordPress website, follow these simple steps. After clicking on “Code Snippets” and adding a new snippet, search for ‘rest api’ in the search box. The “Disable REST API” snippet should appear in the results.
Click on “Use Snippet” to proceed, and then toggle the ‘inactive’ button to ‘active’ to enable the code. Don’t forget to click on “Update” to save your changes.
By completing these steps, you have successfully disabled the REST API on your website. This is an important security measure as APIs can be exploited by attackers to launch DDoS attacks. Disabling REST API helps protect your website from potential threats that exploit these API vulnerabilities.
5. Keep Your WordPress Software and Plugins Up to Date
Keeping your WordPress themes and plugins up-to-date is a crucial step in safeguarding your website from DDoS attacks and bolstering its security. Regular updates ensure that your website is running the latest and most secure versions of the software.
WordPress updates typically include patches for vulnerabilities that could be exploited by DDoS attackers. To update your WordPress plugins, log in to your WordPress dashboard and go to Dashboard >> Updates.
On the updates page, you’ll find a list of plugins that require updating. To update them all at once, select the “Select All” checkbox, then scroll down and click on “Update Plugins.” This simple action helps keep your website protected and resilient against potential DDoS threats.

Also, check and update your WordPress themes.