At some point, you may find yourself in a situation where you need to transfer your WordPress site to a new domain. Whether that day has arrived or is just around the corner, it’s crucial to approach the migration process correctly to ensure you don’t lose the hard-earned search traffic you’ve accumulated.
Before undertaking the task of migrating your WordPress site to a new domain, it’s important to have a compelling reason for doing so. In this article, we will explore the various circumstances that may necessitate a domain change. Moreover, you will receive a detailed, step-by-step guide on how to successfully migrate your website to a new domain without sacrificing your valuable search traffic.
Reasons for Migrating WordPress to a New Domain
There are several compelling reasons why you might consider migrating to a new domain:
Rebranding and Business Transformation
If you’re undergoing a rebranding process that involves significant changes to your business name, logo, direction, or services offered, transitioning to a new domain becomes necessary to align with your new identity.
Recovering from Severe Google Penalties
Sometimes, in the pursuit of boosting search traffic, website owners inadvertently violate Google’s guidelines and receive penalties as a consequence. These penalties can have a detrimental impact on your website’s performance. In such cases, it may be more prudent to start fresh on a new domain rather than attempting to recover SEO rankings, which can be an arduous and uncertain process.
By migrating your website to a new domain, you can leave behind the penalties and move forward with a clean slate. This allows you to focus on rebuilding your online presence and implementing best practices to avoid future penalties.
Ultimately, if rebranding or recovering from severe penalties are compelling reasons for you, it may be the right time to make the move and start anew on a different domain.
Steps to Move Your WordPress to a New Domain
1. Create a Backup of Your Site to Safely Move WordPress Site To New Domain
Before proceeding with the migration process, it’s crucial to create a backup of your WordPress site. This backup will serve as a safeguard in case anything goes wrong during the transfer, allowing you to restore your site to its previous state.
If you prefer to avoid the complexities and potential complications of the migration process, you can opt for our service, where our experienced developers will handle the transfer for you, ensuring a seamless transition.
In this comprehensive guide, we will walk you through the process of migrating your WordPress site using a popular plugin called Duplicator. This plugin stands out due to its user-friendly interface and simplicity, making it an ideal choice for both beginners and experienced users. The best part is that Duplicator is available for free, making it accessible to everyone.
Backup with Duplicator Plugin
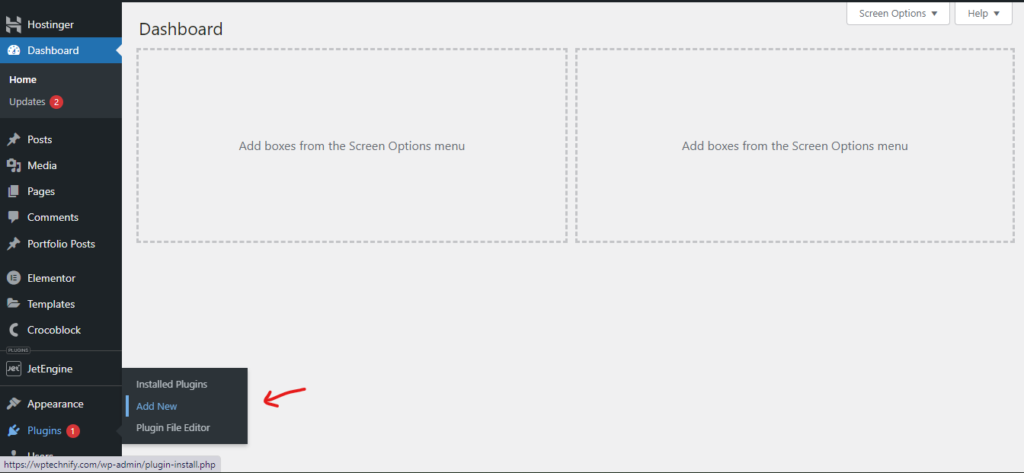
To install the Duplicator plugin, access your WordPress dashboard and navigate to the “Plugins” section. Hover your cursor over the “Plugins” menu item, and then click on “Add New.”
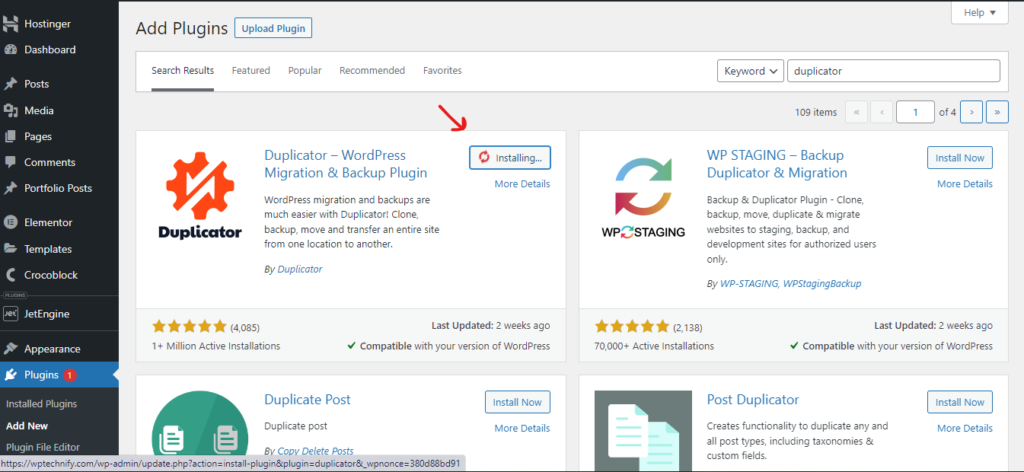
Search for the Duplicator plugin, and once found, install and activate it.
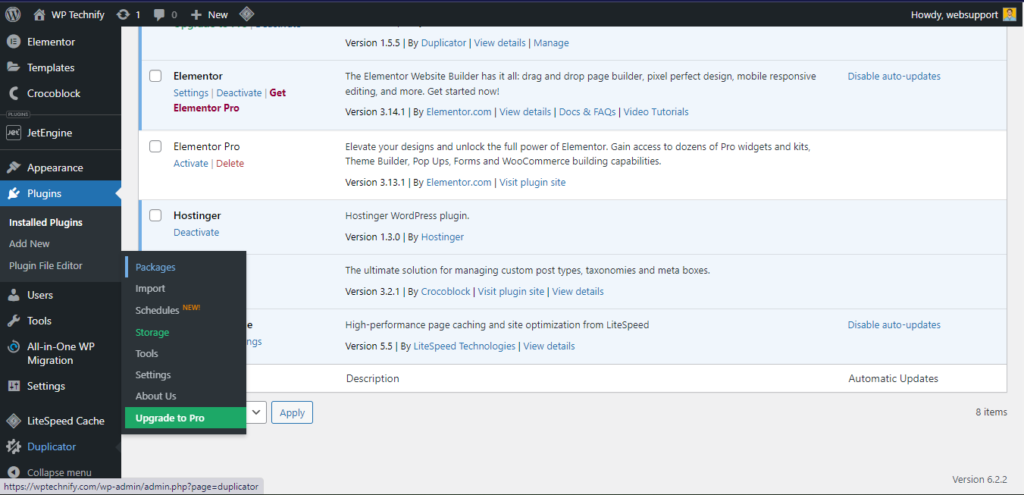
If the installation and activation were done successfully, you should see the duplicator tab on the left side of the dashboard. Select it, then press “Packages”.
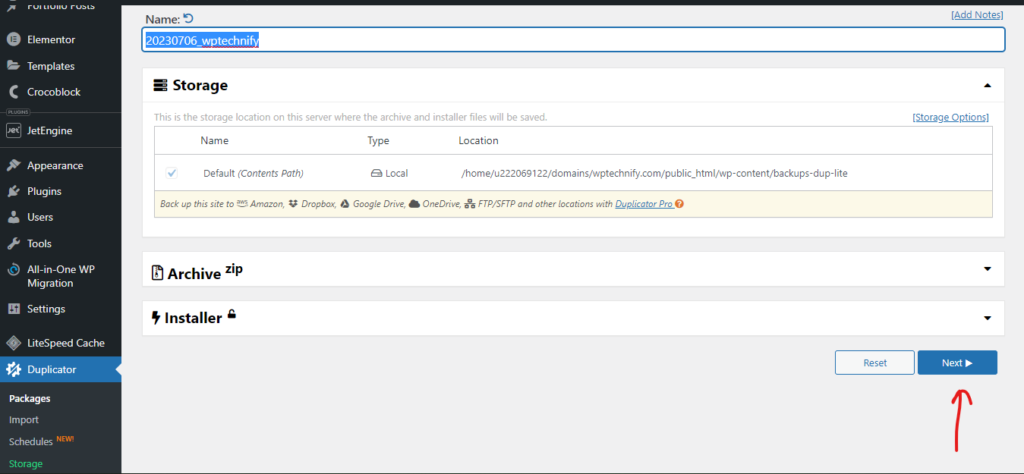
Click “Create New”, and in the Create a new page, click “Next”
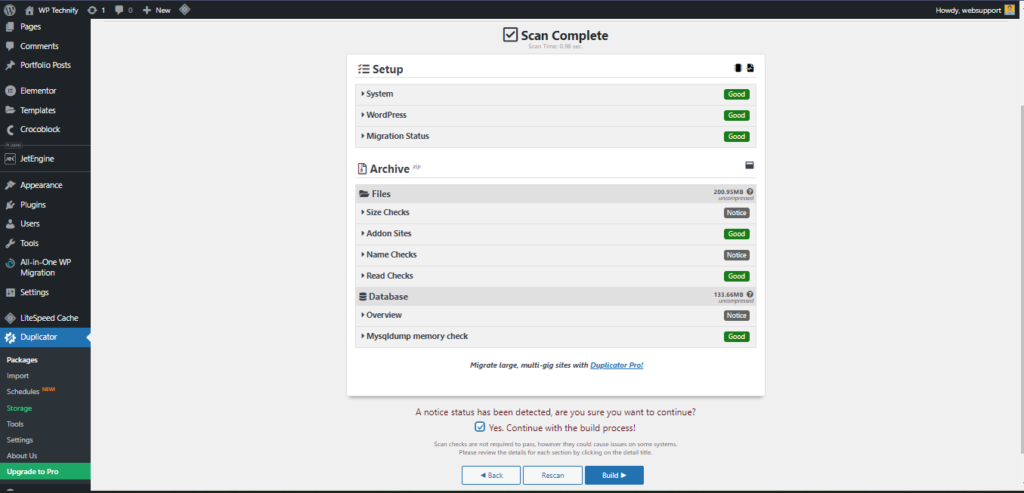
After clicking on the next button, Duplicator will begin scanning your WordPress website. The scanning process usually takes a few minutes. Once the scanning is complete, check the box that says “Yes, continue with the build process” and click on the “Build” button. This action will initiate the creation of a duplicate copy of your website by Duplicator.
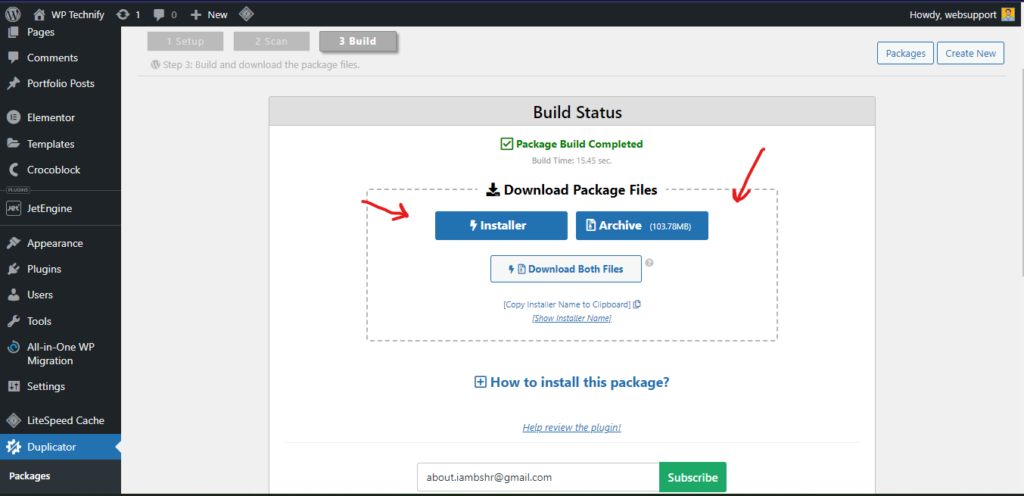
The duration of the build process for your site may vary depending on its size, typically taking anywhere from 3 to 8 minutes. Once completed, you can proceed by clicking on the “Installer” and “Archive” buttons. This will initiate the download of both the installer and archive files. With these files in hand, you’re now prepared to move on to the next step.
If you have followed the steps outlined in this guide, you should now have a complete backup of your website stored on your local machine.
For further information on automatic and manual backups, we recommend referring to our comprehensive WordPress Backup Guide.
With the backup in place, you are now ready to proceed with migrating your website to its new domain.
2. Create a WordPress Database Before You Move WordPress Site To New Domain
A functioning SQL database is essential for the proper functioning of your WordPress site. Therefore, it is necessary to create one before proceeding.
Assuming that you have already obtained a domain name and hosting for your new website, follow the steps below.
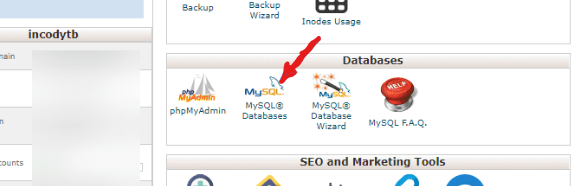
Access your cPanel and navigate to the Databases section. Look for the icon labeled “MySQL Databases” and click on it.
In the following step, locate the section labeled “Create New Database” on the page. Enter the desired name for your database in the provided input box, and then click on the “Create Database” button.
Please note that your database name will consist of your cPanel username followed by an underscore (_) and the name you have entered in the input box.

Once you have created the database, return to the MySQL page and locate the “Add User” section. In this section, you can enter a desired username and password for the new user. Once you have filled in the necessary information, click on the “Create User” button to add the user to the database.

Once again, return to the MySQL page and locate the section labeled “Add User To Database.”
From the available options, choose the user and database that you recently created, and then click on the “Add” button.
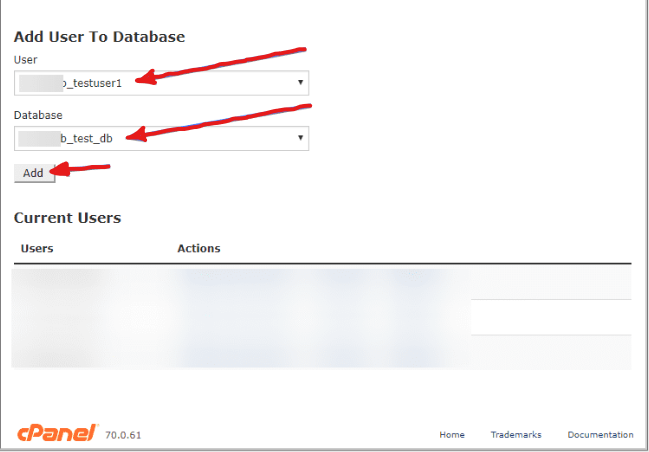
On the next screen, select the “ALL PRIVILEGES” option and click on “Make Changes.” This will create your new database.
Please note that the steps to create a database may vary depending on your hosting provider. If the steps outlined here do not exactly match what you see, it is recommended to contact your hosting company for assistance.
With a copy of your website saved on your local disk and a new database created, you have completed half of the migration process.
3. Upload Files to the New Domain
Once you have completed all the necessary steps, you are now prepared to upload the files to your new domain. The two files you need to upload are the installer and archive files.
You have two options for uploading these files:
- Using an FTP program: You can utilize an FTP program to transfer the files from your local computer to the new domain.
- Uploading directly from cPanel: Alternatively, you can upload the files directly from your cPanel, the control panel provided by your hosting provider.
Via an FTP program
Using an FTP client like FileZilla, establish a connection to the new host server by entering the provided username and password. If you are unsure about these credentials, reach out to your hosting provider for assistance.
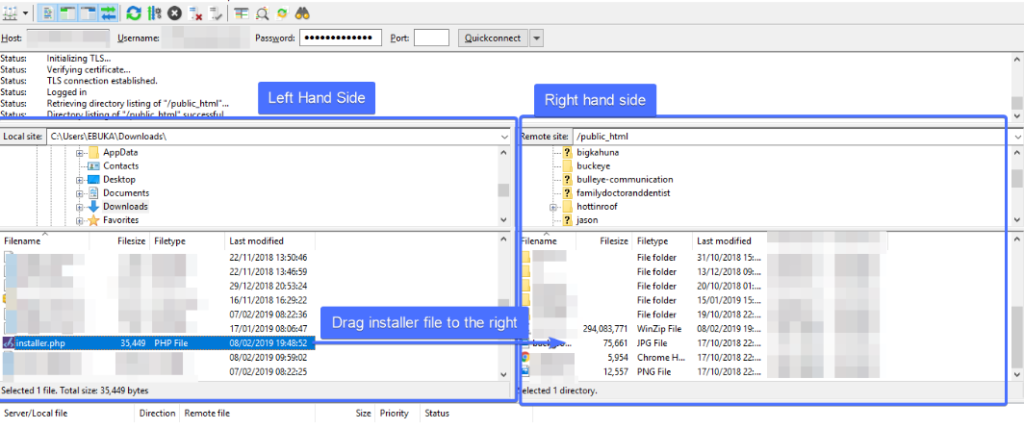
Once connected via FTP, navigate to the desired folder on the new server where you want to transfer your site. This folder is typically called “public_html” and can be found on the right-hand side of FileZilla. Double click on the folder to open it.
Next, locate the installer and archive files that you previously downloaded. These files are usually stored in your download folder and can be found on the left-hand side of FileZilla. It is important to ensure that the archive file’s name remains unchanged to avoid any issues during the unpacking process. Once you have located both files, drag and drop them from the left-hand side to the right-hand side of FileZilla, as illustrated in the image below.
It will take some time for the process to be completed.
Upload directly from cPanel
If you encounter any difficulties using FileZilla or any other FTP program, you have the option to upload files using cPanel.
To do this, log in to your cPanel on the new server.
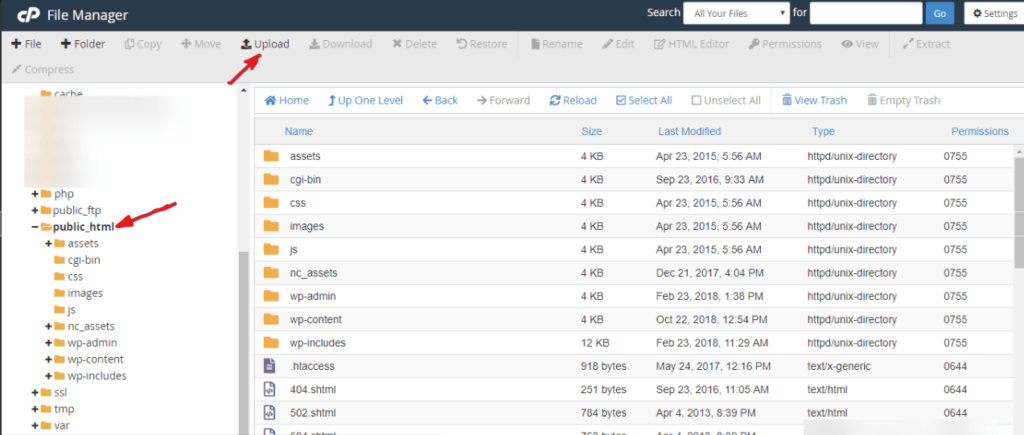
Then, locate and select “File Manager”. Within the file manager, navigate to the folder where you wish to transfer your files (typically public_html), and use the upload feature at the top of the screen to upload the installer and archive files.
4. Install Your Site in the New Domain
Once you have successfully uploaded the files to your new hosting provider, you can start the installation process by entering the following URL into your web browser:
http://mynewwebsite/installer.php
Replace “mynewwebsite” with your actual new domain name. If the file uploads were completed correctly, you will be greeted with the following screen.
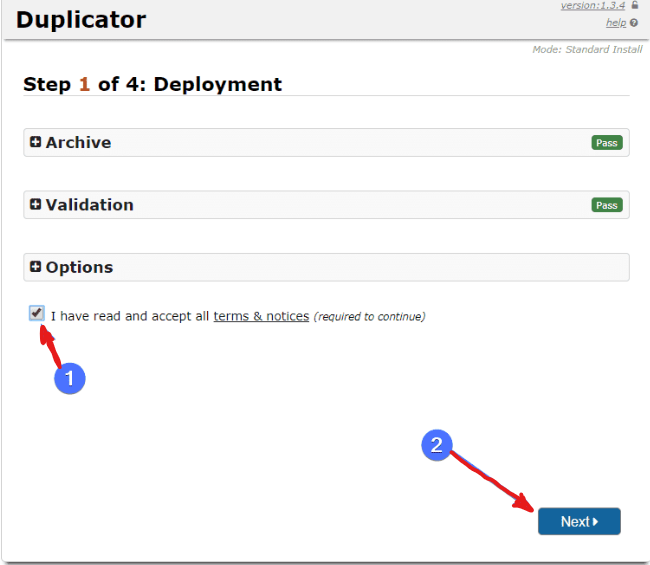
To continue with the migration process, you’ll need to agree to the terms and conditions by checking the corresponding box. After that, click on the “Next” button.
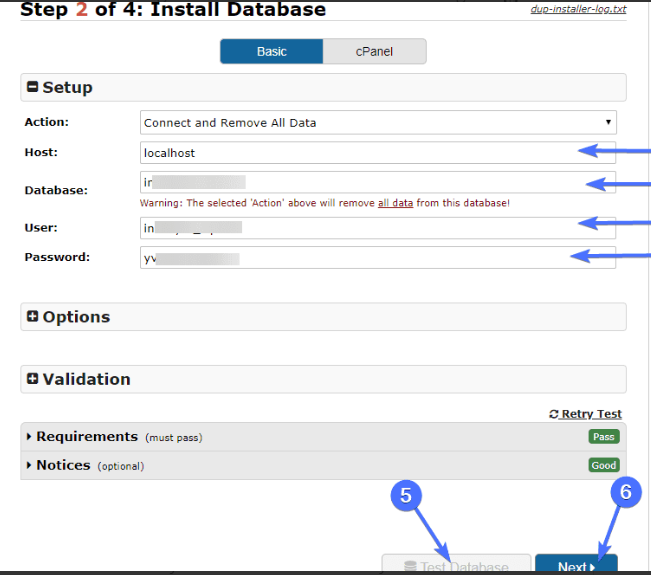
On the following screen, you will be prompted to enter the database details you set up earlier. Provide the necessary information, including the host (typically ‘localhost’), database name, user, and password. Click on the “Test Database” button to verify the connection. Once the test is completed successfully, proceed by clicking on the “Next” button.
On the next page, Duplicator would have detected your new domain and set your URL. If not, input your new URL and click Next. Your site installation would begin and should complete without issues.
On the last step, check the “Auto Delete” option and proceed to login to your moved site.
Once you are logged in, Duplicator will prompt you to save your permalink structure. It is crucial to follow this step in order to maintain the search traffic of your website.
Adding Final Touches After Moving Your WordPress Site to a New Domain
1. Handle 301 Redirects Properly
When it comes to SEO, 301 redirects play a crucial role and should not be overlooked. These redirects ensure that when a user clicks on a link to the old site, they are automatically redirected to the current one.
Setting up 301 redirects correctly is essential. To do this, you will need to access the .htaccess file of your old site using an FTP client. Once you have access to the file, open it and add the following lines of code:
#Options +FollowSymLinks
RewriteEngine on
RewriteRule (.*) http://www.mynewsite.com/$1 [R=301,L]
Make sure to replace “mynewsite.com” with your actual domain. If done correctly, visitors to your old website will be redirected to the new site. It’s always a good idea to test the redirects to ensure they are functioning as intended.
If you encounter any technical difficulties, don’t hesitate to reach out to your web hosting provider for assistance.
2. Fix Broken Links When You Move WordPress Site To New Domain
Having broken links on your website can negatively impact your SEO efforts, so it’s crucial to address them. It’s possible that your old website contains numerous broken links, and even during the migration process, a few links may have become broken. Therefore, it’s essential to check for and fix any broken links in your newly migrated site.
To begin, you can use an online tool specifically designed for checking broken links. Simply enter your URL into the tool and click the “find broken links now” button. The tool will generate a list of outbound links that require fixing.
To fix these broken links, you can utilize the Velvet Blues Update URLs plugin. This plugin is highly effective in resolving broken links on your site.
Additionally, consider reaching out to other website owners or individuals who have linked to your site and kindly request that they update the links to reflect your new domain. This proactive approach can help ensure that all external links pointing to your website remain functional and accurate.
3. Make Updates in Google Analytics
To update the URL in Google Analytics, you need to access the Admin section and navigate to the Property Settings. From there, you can modify the default URL to match the new one.
4. Notify Your Subscribers and Visitors of the Changes
It is crucial to effectively communicate the changes to your loyal website followers to ensure a smooth transition. One of the easiest ways to do this is by sending out emails notifying them about the upcoming changes and providing any necessary instructions. By keeping your loyal audience informed, they can help identify any potential bugs or issues on your website, ensuring that your SEO and overall website performance are not compromised.
Contact us
If you’re looking for professional assistance in migrating your website to a new domain, Wp Technify is here to help. Our experienced team specializes in seamless website migrations, ensuring a smooth transition without any downtime or loss of data. Whether you’re rebranding, changing your business direction, or simply in need of a domain change, we have the expertise to handle the process efficiently. Contact us today to discuss your website migration needs and let us take care of the technical aspects, allowing you to focus on your business.