With the advancements in web hosting services, the process of installing WordPress has become much simpler. Hosting companies now provide convenient one-click installation options, eliminating the need for the traditional time-consuming installation process.
If you’ve always found the manual WordPress installation process to be tedious, this guide is tailored for you. We will explore some of the most popular WordPress installers available and provide step-by-step instructions on how to use them. These installers enable you to quickly and effortlessly set up a WordPress website with just a few clicks.
By following this guide, you’ll discover the ease and efficiency of utilizing these popular WordPress installers, allowing you to get your website up and running in no time.
Understanding WordPress One-Click Installation
The main objective of WordPress one-click install is to streamline the entire process of installing WordPress.
The traditional method of manual WordPress installation involves multiple steps, such as downloading WordPress, extracting files, setting up FTP, and transferring files. This process can be daunting, especially for beginners who are new to WordPress.
Fortunately, WordPress one-click install has revolutionized the installation process. With just a few clicks, you can now swiftly install WordPress without the need for extensive technical knowledge. Some of the popular one-click installers include Softaculous, Fantastico, Installatron, and QuickInstall. In the following sections, we will delve into each of these installers and discuss their features in detail.
Essential Preparations Before Installing WordPress
Before you can proceed with the easy one-click installation of WordPress, there are two essential steps to take. Firstly, you need to acquire a domain name from a domain registrar. This will serve as your website’s unique address that people can use to access it, such as www.wptechnify.com. There are numerous domain registrars available, including Domain.com, BlueHost, Hostgator, and NameCheap, among others.
The second requirement is a web host, which will provide all the necessary resources for your website to be accessible on the internet. With a plethora of web hosting options available, it is important to prioritize three key factors known as the 3S’s: Security, Speed, and Support. Your chosen hosting company should excel in these aspects to ensure a smooth and reliable website experience.
How to Login to Your WordPress cPanel?
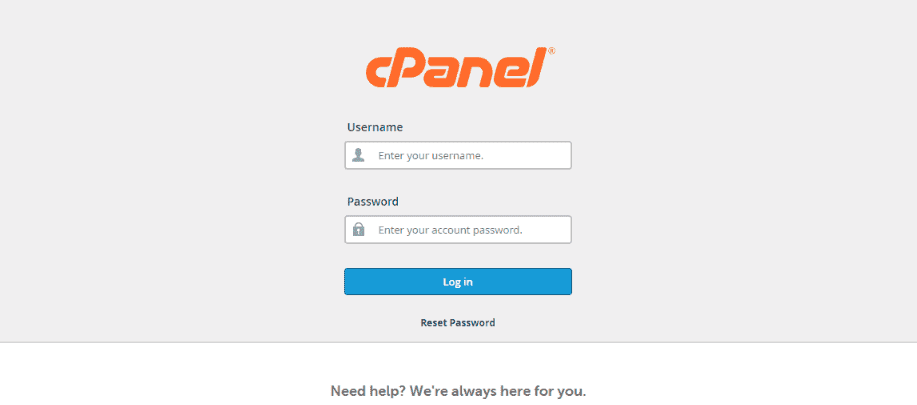
To utilize any of the WordPress installers, you will need to log in to your WordPress cPanel. The cPanel is a user-friendly software designed to streamline server and website management tasks.
Typically, when you sign up for a hosting plan, you should receive a welcome email that includes a link to your cPanel along with your login credentials. To access your cPanel, simply click on the provided link, enter your username, enter your password, and you will gain access.
In case you cannot locate the email, there is an alternative method to access your cPanel. Just type your domain name into your web browser and append either “:2082” or “:2083” to it.
If you have already purchased an SSL certificate for your domain, use “:2083” as follows: https://mywebsite.com:2083.
Otherwise, use “:2082” like this: http://mywebsite.com:2082.
You’ll have to contact your hosting provider for your login details.
One-Click WordPress installers
In this article, we will delve into the topic of one-click installers and focus on two prominent options: QuickInstall, and Fantastico.
The choice of which installer to use depends on your WordPress hosting provider. Some web hosts exclusively offer Softaculous, which is a comprehensive solution on its own. On the other hand, there are hosting providers that provide QuickInstall, Fantastico, or other similar alternatives.
It’s worth noting that your web host may offer a different auto-installer than the four mentioned above, and that’s perfectly fine. Most one-click installers function in a similar manner, providing a user-friendly interface to streamline the installation process.
QuickInstall – WordPress One-Click Install
QuickInstall is a popular auto-installer that HostGator utilizes to simplify the installation of WordPress. With QuickInstall, users can quickly and effortlessly set up their WordPress websites without the need for manual configuration or technical expertise. HostGator’s integration of QuickInstall streamlines the process and makes it more accessible for users to get their WordPress sites up and running promptly.
How to Install WordPress using QuickInstall
Step 1
Login to your hosting account’s cPanel.
Step 2
Search for QuickInstall using the Search bar and click on it. This takes you to the installers page.
Step 3
The left side menu lists all scripts and CMS’s you can install with QuickInstall. Click on ‘WordPress‘.
Step 4
Fill in your domain name, username, email, and the rest.
Step 5
Lastly, click on the ‘Install‘ button.
Once QuickInstall takes over, it handles the installation of WordPress on your behalf. A confirmation message will indicate the successful installation, providing you with your username and password. To begin configuring your website and sharing content, simply click on the ‘Login’ button. This seamless process allows you to swiftly access your WordPress site and start customizing it according to your needs.
Fantastico
Fantastico, similar to other installation tools, simplifies the process of installing WordPress, making it incredibly user-friendly. With the help of Fantastico, users can effortlessly set up their WordPress websites without the need for technical expertise or complex configurations. This intuitive installer streamlines the installation process, allowing users to quickly get their WordPress sites up and running in no time.
How to Install WordPress using Fantastico
Step 1
Login to your cPanel dashboard
Step 2
Search for the ‘Fantastico’ icon, and click to launch the auto-installer.
Step 3
Go to Blogs >> WordPress on the left side of your screen.
Step 4
Hit the ‘Click here to install WordPress’ button to continue.
Step 5
Lastly, fill in your location details, WordPress admin details, as well as other details, and click the “Submit” button. You have successfully installed WordPress using Fantastico.
What next after Installing WordPress
Congratulations on becoming a proud owner of a WordPress site! It’s an exciting time, and now it’s time to dive into the world of WordPress and get acquainted with your new website.
Once you have completed the installation process, you will be greeted with the WordPress dashboard. This is your administrative panel, where all the important actions and configurations of your site take place. It’s like the control center of your website, where you can manage and customize various aspects, such as themes, plugins, content, and settings. So, let’s roll up our sleeves and start exploring the powerful features and functionalities of your WordPress dashboard!

The left-side menu in WordPress is known as the Navigation menu and contains various items with distinct functions. Here are some key items you will frequently use:
Posts: Clicking on “Posts” allows you to create new posts or access your existing ones.
Media: This item enables you to add new media files, such as images and videos, to your website.
Pages: In this section, you can add and manage the pages of your site.
Appearance: Here, you can choose your WordPress theme, customize its settings, and control the overall appearance of your website.
Plugins: If you need to install or update plugins, this is where you go. The WordPress plugin directory offers thousands of plugins, including contact form plugins, backup plugins, security plugins, and more.
Don’t expect to become fully familiar with your dashboard in just one day. Give yourself time to explore and learn. With practice, you will become proficient in managing your WordPress site and navigating the dashboard efficiently.
Conclusion – WordPress One-Click Install
The convenient 1-click install feature in cPanel has made the process of creating WordPress sites a breeze. However, the journey doesn’t end there. Once you have successfully installed WordPress, there are still important tasks to handle. Engage with your audience through captivating posts, regularly update your WordPress themes and plugins, remain vigilant for any potential WordPress errors, and swiftly address them.
If you ever find yourself in need of assistance with ensuring the security, uptime monitoring, speed optimization, or any other WordPress-related concerns, don’t worry. Fixrunner is here to provide personalized WordPress support services. Feel free to reach out to us for expert guidance and assistance in maintaining your WordPress website.